Newer versions of Windows do not mount COM ports automatically. We suggest mounting them to make the tuning and logging process as smooth as possible. You should only have to do this once, but if you have issues after a Windows update, check to make sure that port are mounted. (Click here if you just want mounting instructions without the test).
HOW TO CHECK IF COM PORTS ARE MOUNTED
- Open Device Manager (Typing "Device Manager" in the search bar in the lower left corner of your screen will bring it up, or you can find it in the Control Panel of your Windows laptop).
- Plug your Motoza cable into the USB port.
- Scroll down to Ports (COM & LPT).
- Unplug the cable. If Ports (COM & LPT) are no longer visible when you unplug the cable, ports are not mounted.
TO MOUNT COM PORTS
1. Open Device Manager.
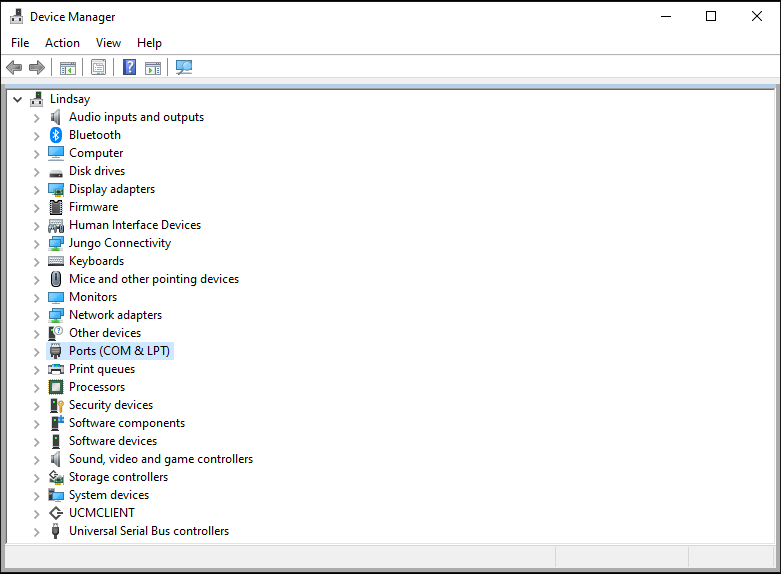
2. Click ONCE on any item in the list.
3. Click on the Action menu.
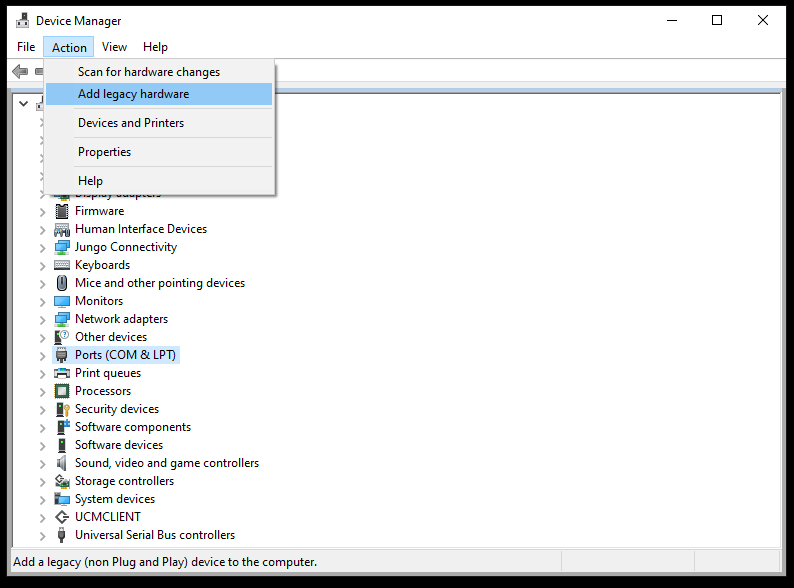
4. Click Add legacy hardware. This will open the Add Hardware Wizard in Windows
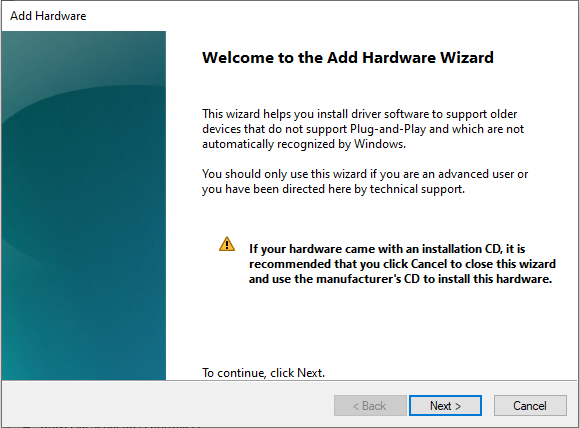
5. Click Next.
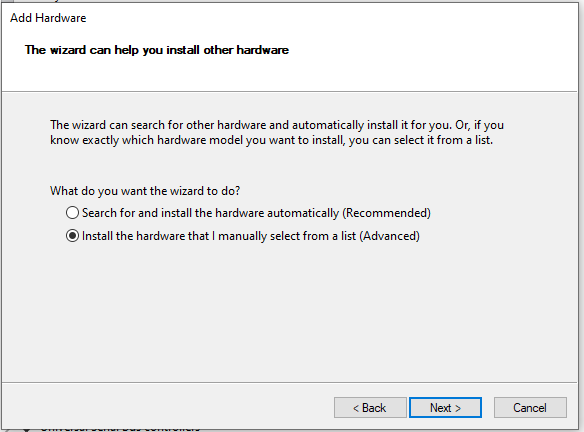
6. Select "Install the hardware that I manually select from a list (Advanced) and click Next.
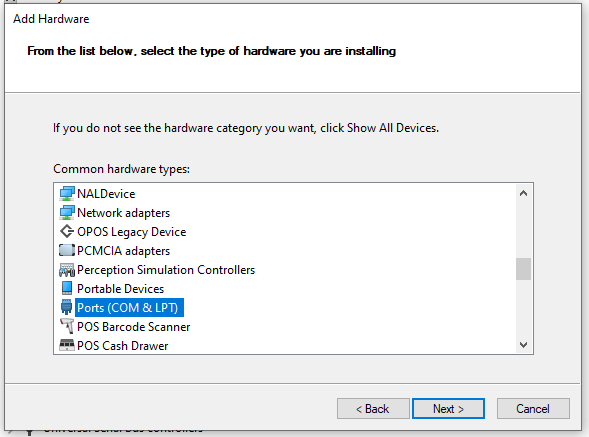
7. Scroll down and select Ports (COM & LPT) as shown above.
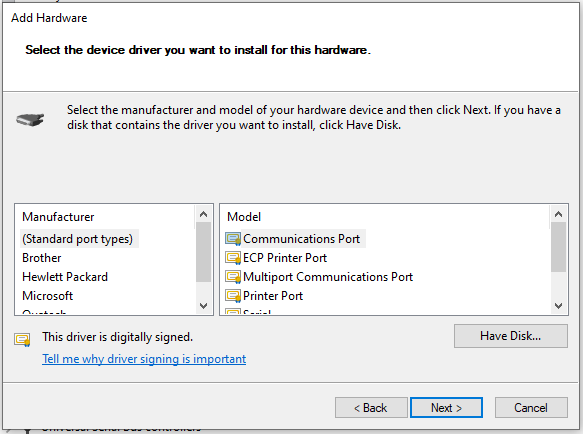
8. By default, (Standard port types) will be selected in the Manufacturer list and Communications Port will be selected in the Model list. Ensure these options are selected and click Next.
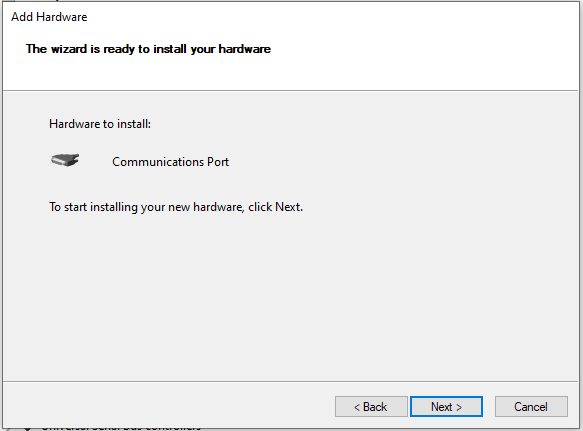
9. Click Next again.
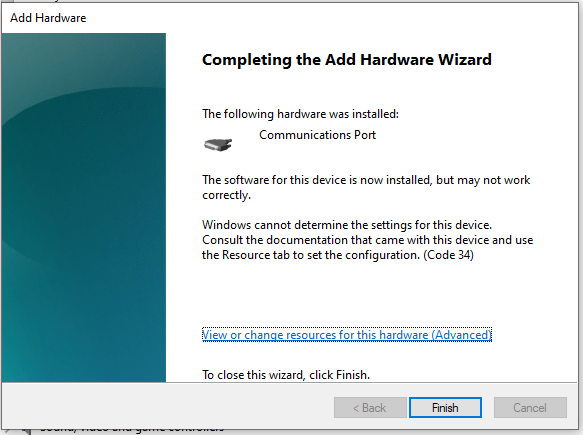
Click Finish and COM ports will be enabled. There may be an error symbol next to the newly installed COM port, this will not be an issue and can be ignored.
Ports should stay mounted in Windows, however, if you experience issues after a Windows update, repeat the procedure.
